Landscape Photography

Sonly Alpha 9 III - Is it the game changer for photography? by Adam Jacobs

Photography and camera technology is changing at such a fast pace. I’m a dedicated Nikon user but couldn’t help but be intrigued by Sony’s latest news. Enter the Sony Alpha 9 III, the latest addition to the acclaimed Alpha series. Packed with cutting-edge features, this camera is set to redefine the standards of excellence in photography. Below are just some of the highlights of this exceptional camera:


1. Sensational Speed and Sensitivity: At the heart of the Sony Alpha 9 III lies a 35mm full-frame Exmor RS CMOS sensor, boasting 35.9 effective megapixels. This sensor is not only high in resolution but also incredibly sensitive. With a native ISO range of 100-32,000, expandable to 50-102,400, this camera is a low-light champion, capturing stunning images in the darkest conditions.

2. Lightning-Fast Autofocus: The Alpha 9 III features an impressive Fast Hybrid AF system, equipped with 759 phase-detection points and 425 contrast-detection points. This translates to lightning-fast, highly accurate focus, even for fast-moving subjects. The Real-time Eye Autofocus ensures that portraits are always crisp and detailed, while Real-time Tracking makes capturing moving subjects a breeze.

3. High-Speed Continuous Shooting: With the capability to shoot at an astonishing 30 frames per second, the Sony Alpha 9 III is perfect for sports, wildlife, and action photographers. Its large buffer allows you to capture sequences of shots without missing a moment. This speed, combined with a silent electronic shutter, is a game-changer for capturing discreet, noise-free images.

4. Stellar 8K Video Performance: Videographers, get ready to be amazed! The Alpha 9 III is an 8K video powerhouse. With its 8K recording capability, you can produce stunning, cinematic-quality footage with immense detail. This camera also supports 4K video at up to 120 frames per second for silky-smooth slow-motion shots.

5. Ergonomic and Weather-Sealed Design: Sony has taken ergonomics seriously with the Alpha 9 III. The camera's design ensures a comfortable grip and easy access to essential controls. Its robust build and weather-sealing allow you to venture into various shooting conditions with confidence, knowing your equipment can handle the elements.

6. Extended Battery Life: With the NP-FZ100 rechargeable battery, the Alpha 9 III offers an impressive battery life of up to 1,000 shots per charge. This extended battery life is a testament to Sony's commitment to minimizing interruptions during your photography sessions.

7. Connectivity and Workflow: The Alpha 9 III comes equipped with built-in Wi-Fi and Bluetooth for seamless connectivity to your smart devices. You can instantly transfer and share your images or even control the camera remotely. This connectivity streamlines your workflow, allowing you to share your creative vision effortlessly.

Conclusion: The Sony Alpha 9 III camera is a true game-changer, offering exceptional speed, sensitivity, and capabilities that cater to both photographers and videographers. Its ergonomic design, weather-sealed build, and extended battery life make it a reliable tool for a wide range of shooting conditions. With the Alpha 9 III in your hands, you're equipped to redefine excellence in photography and capture moments with unparalleled precision and creativity.

Yosemite Valley - Channeling My Inner Ansel by Adam Jacobs

During my photography workshops, I often refer to the work of one of the masters of landscape photography Ansel Adams to showcase how the power of great composition, being patient and understanding the fundamentals of light are crucial in creating great photographs. Much of his work was shot in Yosemite National Park in California.

I just spent Memorial Day weekend in the park photographing where there has been a recent spell of wetter than normal weather. This meant that the waterfalls were flowing stronger than normal, the Merced river was full of fast flowing water and the trees were lush, verdant and green - great conditions for photography. Unusually, for late May there was even a freak snow storm which blanketed much of the park, clearing out most of the crowds and leaving me to explore many new areas without having to deal with traffic or people in my shots (which can often be the case at this time of year).

Below are some of my favorite shots as I channeled my inner Ansel. Do you prefer the color or black and whites?

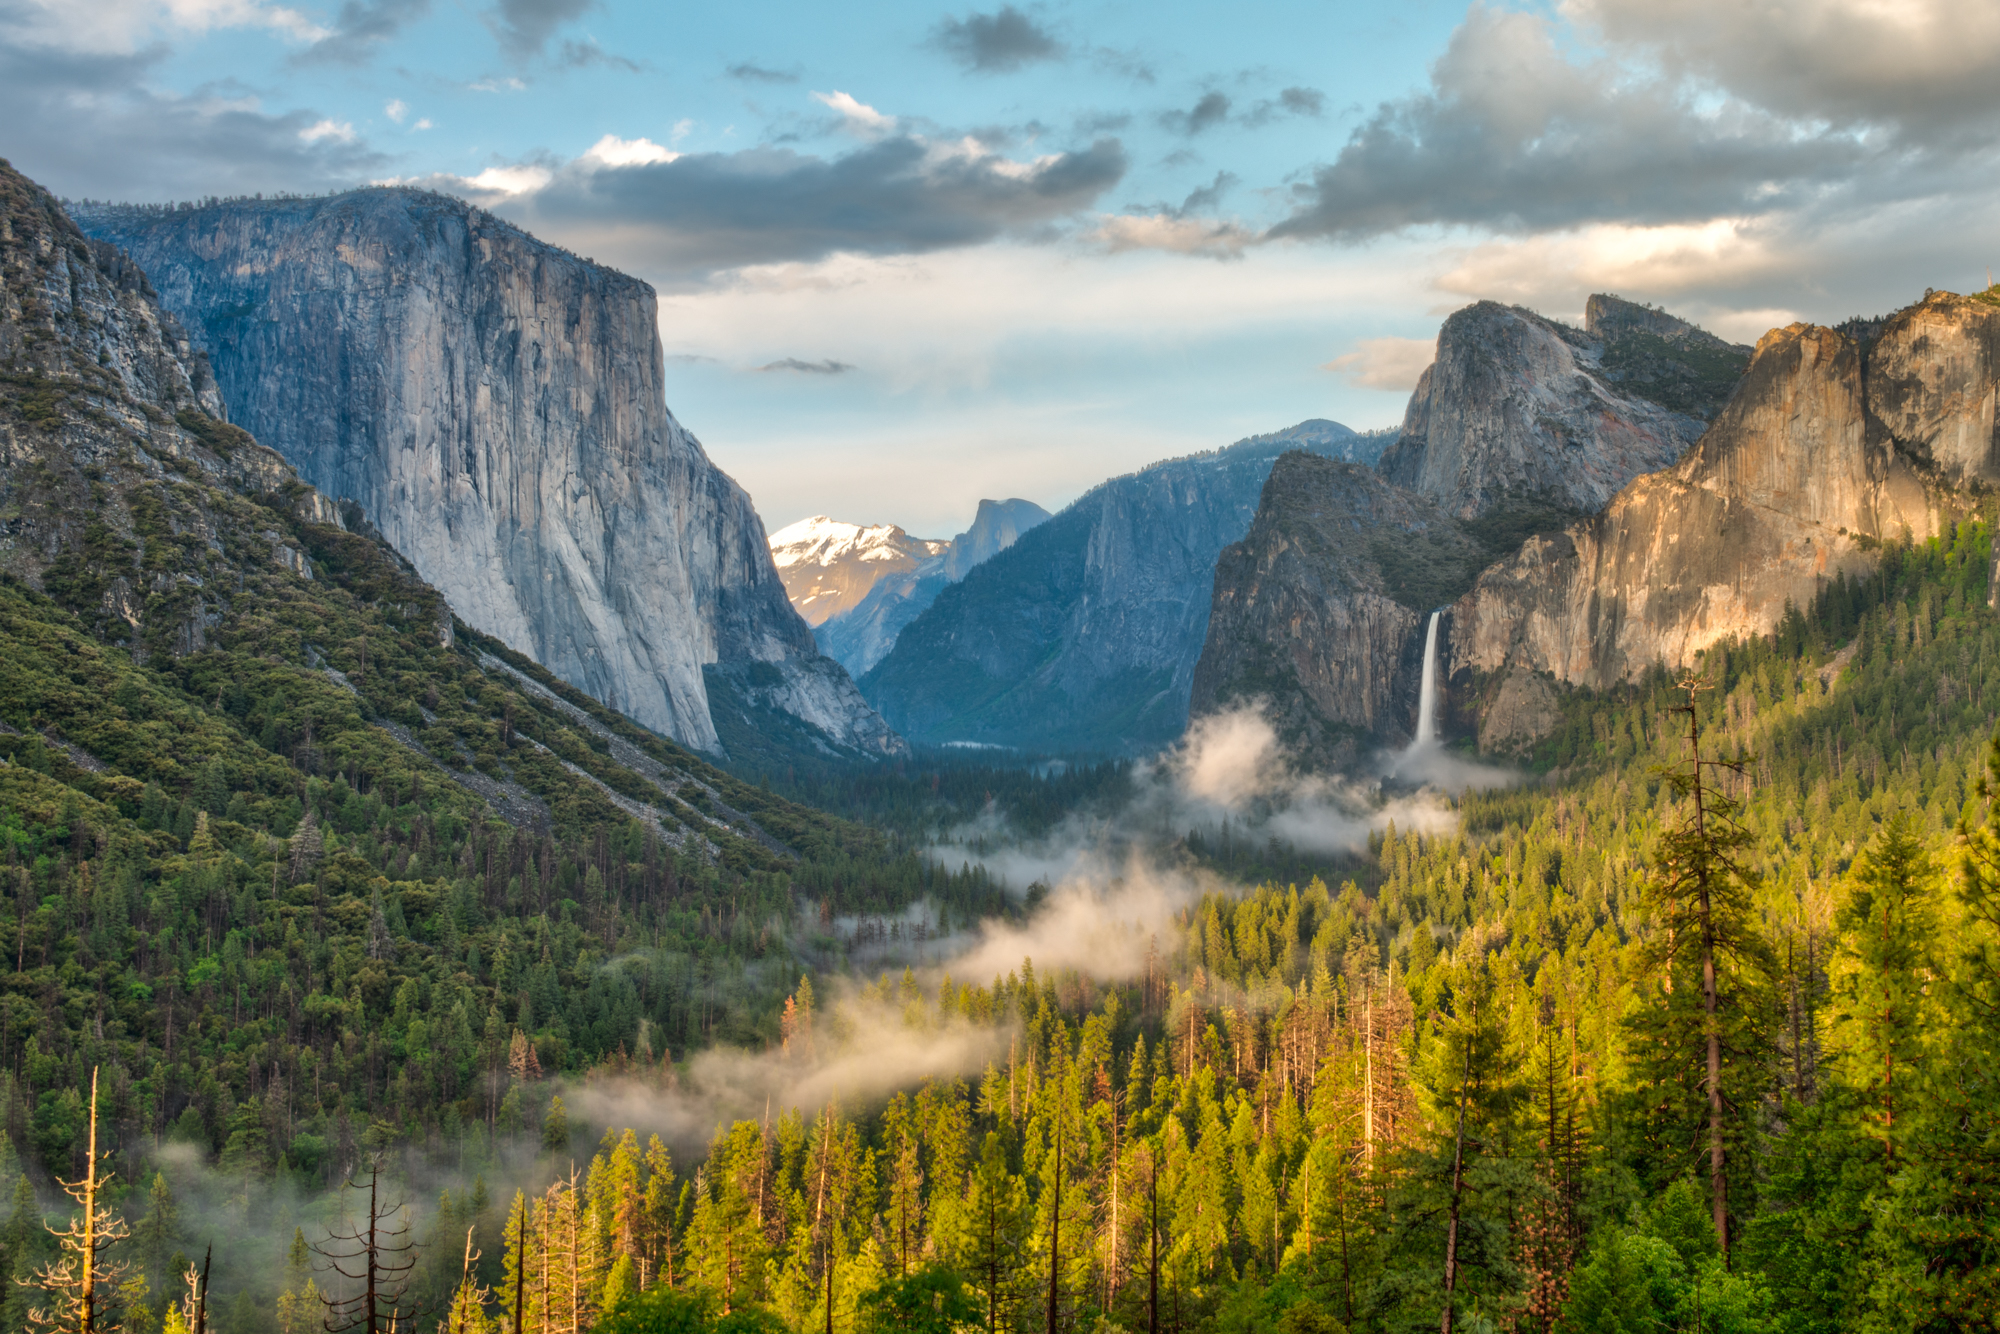
After visiting this spot so many times, this was one the best times I’ve seen the light falling so perfectly on El Capitan on the left and Bridal Falls on the right. I also love the big booming clouds and how you can see Half Dome in the background …

After visiting this spot so many times, this was one the best times I’ve seen the light falling so perfectly on El Capitan on the left and Bridal Falls on the right. I also love the big booming clouds and how you can see Half Dome in the background with a little covering of snow. There is a reason this spot is known as Inspiration Point!! This photo is going to look awesome printed out huge.

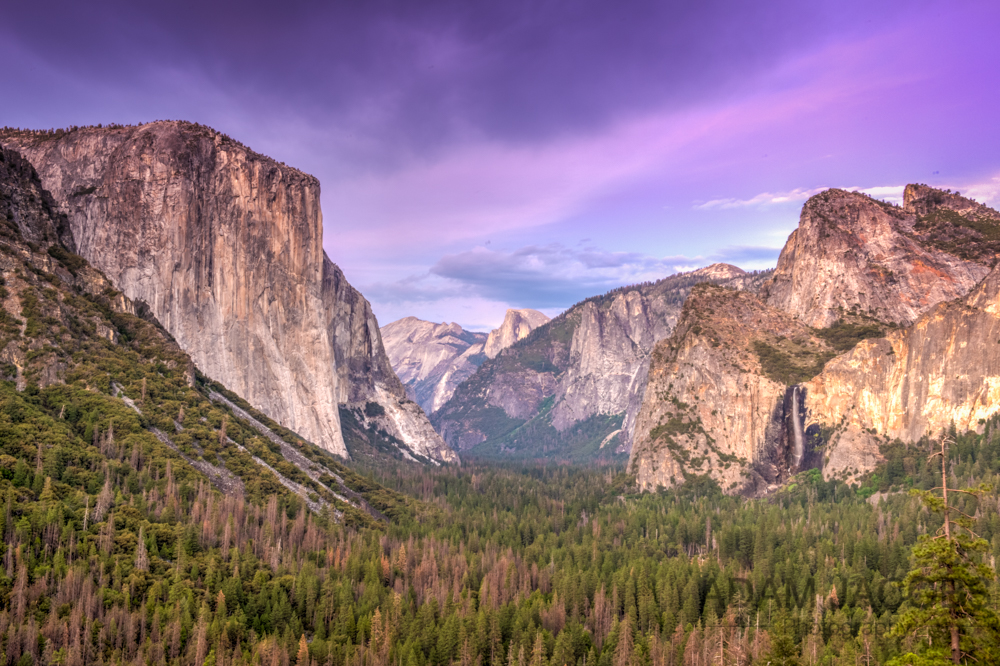
Color version of the above…which do you prefer?

Color version of the above…which do you prefer?

Another view from Tunnel Point/Inspiration Point taken late at night as low fog settled over the valley creating a perfect leading line to Bridal Falls.

Another view from Tunnel Point/Inspiration Point taken late at night as low fog settled over the valley creating a perfect leading line to Bridal Falls.

Color Version of the above

Color Version of the above

My neutral density filters always come in useful on trips to National Parks. This was taken with a 6f stop ND filter to give the fast flowing water (pretty unusual for this time of year) a soft, silky appearance. I got some wet feet but it was defin…

My neutral density filters always come in useful on trips to National Parks. This was taken with a 6f stop ND filter to give the fast flowing water (pretty unusual for this time of year) a soft, silky appearance. I got some wet feet but it was definitely worth it for this shot!

Tips for Aerial Photography - San Francisco by Adam Jacobs

I recently flew in a ‘no doors’ helicopter above San Francisco whilst being filmed for a documentary focusing on my career. Wow, what an amazing experience! I’ve been fortunate enough to previously fly over both New York and Miami . However, cruising over the Bay Area on a perfectly clear day was a totally different experience; completely breathtaking and made for some stunning photo opportunities. I can’t wait to add this city to my fine-art Urban Symmetry series which recently was shown in New York and Germany.

In the meantime, given that I’ve now photographed quite a few times out of helicopters, I thought I’d put together some of my top tricks and tips for anyone who is planning on taking their camera and shooting in the skies out of a chopper. Enjoy!

Adam Jacobs Aerial Helicopter San Francisco Photography 1
Always look fo unique oblique angles when shooting out of helicopters. Here’s the Salesforce Tower looking South all the way to Twin peaks.

Always look fo unique oblique angles when shooting out of helicopters. Here’s the Salesforce Tower looking South all the way to Twin peaks.

Research and Prepare

Photographing from a helicopter takes preparation, planning and research therefore organization beforehand is crucial. Space inside a helicopter is incredibly limited so you want to take as little as gear as possible to mean you can concentrate on shooting and enjoying the flight. I would also advise taking the minimum amount of accessories when as it is unlikely you will have an opportunity to change memory cards or fish around your bag for filters or other accessories; the last thing you want is a lens hood falling off and hitting someone on the head…that’s a serious law suit on your hands!!

I would actually advise removing all hoods off your lenses before flying and leaving them on the ground. I also would take the largest capacity memory cards you have to mean you don’t have to change them when in the air; I loaded my two bodies with two 64gb high speed Lexar Compact Flash Cards. Additionally, changing lenses during flight without introducing dust into your sensor with the wind swirling around is virtually impossible. Meanwhile, the strength of the wind generated by the rotors, means even if you tried to change lens there is a good chance of it falling out and you never seeing it again.

Also, have a think if possible of what you want to capture before taking flight. I had carefully thought out a shot list before setting out considering what I wanted to capture as well as the position of the sun, angle of the light and where I would need the helicopter to be positioned to get the perfect shots. Fortunately, I was working with a fantastic pilot, John from Bay Aerial Photo, who really understood my vision and was able to get me into the ideal spots. Communication with the pilot is also really important. They will have flown these routes hundreds of times before and will be able to get you in the right positions to get your shot.

What gear to take?

To ensure that you don’t need to switch lenses at any point, I recommend bringing two cameras if you can. I flew with the Nikon D850 and D800 securely attached to my torso with my trusty Black Rapid straps and a GOPRO 4 strapped to my chest for behind the scenes video and my Manfrotto Sling Bag tucked into a small compartment and tethered to the front passenger seat should I need any miscellaneous gear in an emergency. I was fully harnessed to the helicopter both on the frame and the floor before take off, meaning that I could virtually step out of the doors as I increasingly gained confidence and shoot directly down onto the city before and avoid getting the skid in the shot.

Shooting the Golden Gate with a 24-70 lens! Notice that I’m wearing a beanie and thick jacket… It’s often much chillier when up in a helicopter.

Shooting the Golden Gate with a 24-70 lens! Notice that I’m wearing a beanie and thick jacket… It’s often much chillier when up in a helicopter.

You want to make sure that all your gear is secure and fastened down before take off as helicopters can move around a lot; you do not want things rolling around the chopper or even worse falling out. Everything needs to be clipped to the helicopter or me at all times with no exceptions. Even a pair of sunglasses falling off could become a dangerous projectile if falling off over San Francisco. Therefore, tethering all of my bodies using a variety of different clamps and cords was vitally important to ensure that everything was secure and safe. As I was flying with just two bodies and knew that I would not be able to regularly and easily switch lenses, lens choice was crucial to maximize my time in the sky.

I knew I wanted to try and capture the city with wider, abstract angles as opposed to tight crops so opted to take up my Nikon 24-70mm 2.8 on my D800 and my Nikon 14-24mm on my D4. In truth, I ended up shooting 95% of the shots with the D800 as it soon became obvious that the 14-24mm was a little too wide. I was constantly capturing both the rotors of the chopper and the skid, that part of the helicopter on which it rests on the ground or where you can rest your feet. With the 14-24mm it also soon became apparent that blurry rotor blades were creeping into my frame thus ruining an otherwise perfect sunset or moody sky. Knowing this will save you a lot of time and frustration in post-production once you’re back on the ground. Occasionally, it was quite nice to use the wider lens and capture the helicopter in the shot in order to contextualize the shot and it was also useful for behind the scenes.

However, I was definitely more comfortable with the versatility and focal length that the 24-70mm offered me and ended up using this lens for the majority of the time. I would love to fly another time with a 70-200mm to capture some more tight photographs where I could pick up some more on details of buildings and elements of landscapes but I was very content with the images captured with the 24mm-70mm and would recommend this as a good focal length for your aerial photography adventure.

A beautiful, clear day in San Francisco made for the perfect conditions for an aerial photograph of the Golden Gate Bridge with Marin, Tiburon, Salsultio in the background. The versatility of using a 24-70mm lens gave me the otpion to either come in…

A beautiful, clear day in San Francisco made for the perfect conditions for an aerial photograph of the Golden Gate Bridge with Marin, Tiburon, Salsultio in the background. The versatility of using a 24-70mm lens gave me the otpion to either come in tight or get the whole bridge in the frame as with this shot.

Looking straight down on the South Tower of the Golden Gate Bridge in San Francisco as a boat passes through the Bay.

Looking straight down on the South Tower of the Golden Gate Bridge in San Francisco as a boat passes through the Bay.

Camera Settings: Beware of Vibrations

In terms of camera settings, given my familiarity with my cameras I always shoot on manual but, always considered shutter speed as my main priority. There is a huge amount of motion and vibration inside the heli with constant vibrations and shaking all potentially causing your photographs to be soft. Subsequently, a general good rule to follow during the day is that you double your focal length in terms of shutter speed. By this I mean, that if you are using a focal length of 500m you should be shooting at 1/1000sec or faster. In practice though if you don’t have a large lens, I would ideally (obviously dependent on light conditions) still try to shoot with a shutter speed of 1/1250 or higher if possible. I did have to drop mine down much lower when shooting at night and push up my ISO but ideally you want to keep that shutter speed fast to keep your photographs free of motion blur. Luckily, with the advancement in CMOS sensors, you are now able to shoot on the high-end cameras at 3200 or 6400 with relatively clean images making shooting at dusk or night much easier than a few years ago where it would have been near on impossible. I find with my D800 that I can get relatively clean shots close to 3000 so pushing my ISO was not too much of a concern for me. I would rather have slightly noisy photographs than soft ones where I can do nothing with them in postproduction.

Also, avoid leaning on the side of the chopper for stabilization; remember it is constantly moving and vibrating. Therefore, it is not providing a sturdy support and will merely server to create more blur in your images. Another helpful tip is to lean forward so that your back is not in contact with your seat back if you are not sitting on the floor of the chopper as a lot of vibration transfers through the seat back to your body and therefore camera. Remember, the longer focal length you use will obviously also require a faster shutter speed especially if you start poking it out the chopper due to the swirling winds.

An aerial photograph of the San Francisco financial district including the SalesForce Tower, Transamerica Building and Bay Bridge taken in March 2019. A fast shutter speed and leaning slightly out of the helicopter ensured that this image remained t…

An aerial photograph of the San Francisco financial district including the SalesForce Tower, Transamerica Building and Bay Bridge taken in March 2019. A fast shutter speed and leaning slightly out of the helicopter ensured that this image remained totally sharp.

Since I was shooting RAW files the whole time I kept my white balance on Auto and use the highly reliable AF-S on the Nikons switching from single to multiple focus points depending on what I photographing. Further, in terms of aperture I generally varied between f/5.6 to f/11 depending on the light available and the subject I was shooting. In New York it was a daytime shoot and despite it being overcast I was able to use a higher aperture than in Miami where less ambient light meant I had to close up my aperture out of necessity.

I also chose to use manual ISO, which gave me greater control. On my first flight experiment, I did experiment a little with the Auto ISO feature but found that a lot of my images were coming out under exposed so quickly switched to manually control the ISO. My flight was in the mid afternoon so I was constantly changing my position in relation to the lower lying sun. Therefore, personally I preferred being able to quickly adjust my ISO to achieve the optimal exposure.

Being able to quickly change the camera settings manually allows you to cope with tricky lighting situations such as this aerial photo. The sun was facing directly towards me and I had to adjust ISO and aperture to compensate and get the look I want…

Being able to quickly change the camera settings manually allows you to cope with tricky lighting situations such as this aerial photo. The sun was facing directly towards me and I had to adjust ISO and aperture to compensate and get the look I wanted, to feature Coit Tower looking all the way out to the Golden Gate Bridge.

Enjoy it

Make the most of being in the air and shoot constantly. I would recommend putting your camera on burst mode or even better bracketing exposures if lighting conditions are variable to ensure that you get the correct exposure. It is not often that you will have the chance to be in such a unique and fortunate position so I would take every opportunity to capture as many frames as you can; you can always delete them when you get home if you have too many but you won’t be able to go back up and take more photos unless you just happen to have a helicopter on tap – some of us can only dream!
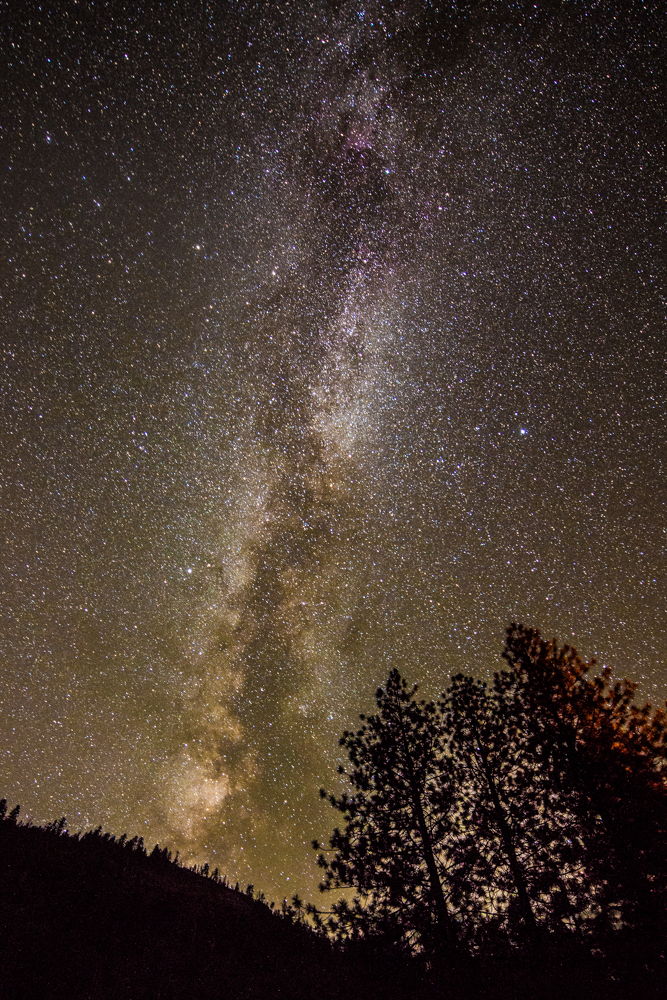
It is not everyday that one gets to go up in a helicopter so make the most of it. Obviously you will be primarily there to take pictures but don’t forget to take the time to lower your camera occasionally and give yourself a few moments to admire how different things look from high up and overall have fun making some fantastic photographs.

Asking my pilot to position the helicopter lower enabled me to get this unique shot of Alcatraz in the foreground with the entire San Francisco city skyline perfectly composed behind it.

Asking my pilot to position the helicopter lower enabled me to get this unique shot of Alcatraz in the foreground with the entire San Francisco city skyline perfectly composed behind it.

Don’t be afraid to experiment with focal lengths and go tighter to capture different types of images.

Don’t be afraid to experiment with focal lengths and go tighter to capture different types of images.

Photographing Joshua Tree National Park by Adam Jacobs

Joshua Tree National Park is so different to any other National Park I’ve visited in the States. For much of the time, It’s vast, arid and other-worldly landscape makes you feel as if you are in Mars. However, the park is incredibly interesting and has plenty to explore and photograph with its diversity offering ample opportunities for landscape photographers: there are areas where cool cactus formations are clustered together and other regions where enormous and interesting rocks formations have been formed from seismic activity and sculpted by hundreds of years of erosion structures. In fact, I could even imagine it making a great backdrop for a fashion shoot! And then, of course, there are the Joshua Trees. These trees, twisted and contorted in their appearance, have a Medusa-esque look and despite apparently falling in number still stretch in many parts of the park further than the eye can see.

Entering Joshua Tree National Park

Entering Joshua Tree National Park

Desert Sunset - Joshua Tree National Park

Desert Sunset - Joshua Tree National Park

A classic Joshua Tree at sunset - Joshua Tree National Park

A classic Joshua Tree at sunset - Joshua Tree National Park

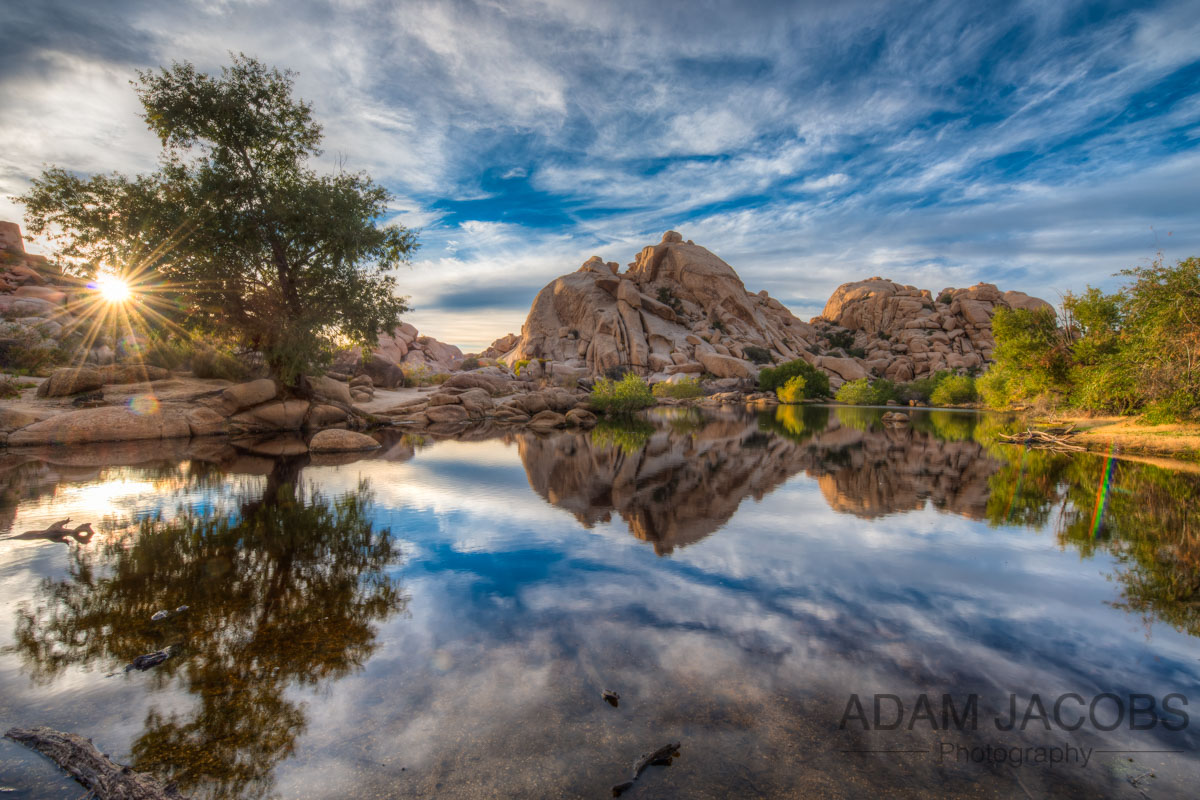
Barker Dam in Joshua Tree was the only place I found water in the Park. I was told by some locals that it was extremely rare for it to be this full so I stuck around and was rewarded with an amazing sunset! See the photos and video below.

Barker Dam in Joshua Tree was the only place I found water in the Park. I was told by some locals that it was extremely rare for it to be this full so I stuck around and was rewarded with an amazing sunset! See the photos and video below.

Behind the scenes with my trusty Gitzo Mountaineer tripod photographing Barker Dam.

Behind the scenes with my trusty Gitzo Mountaineer tripod photographing Barker Dam.

One of my shots from the amazing sunset at Barker Dam in Joshua Tree National Park!

One of my shots from the amazing sunset at Barker Dam in Joshua Tree National Park!

And another sunset at Barker Dam.

And another sunset at Barker Dam.

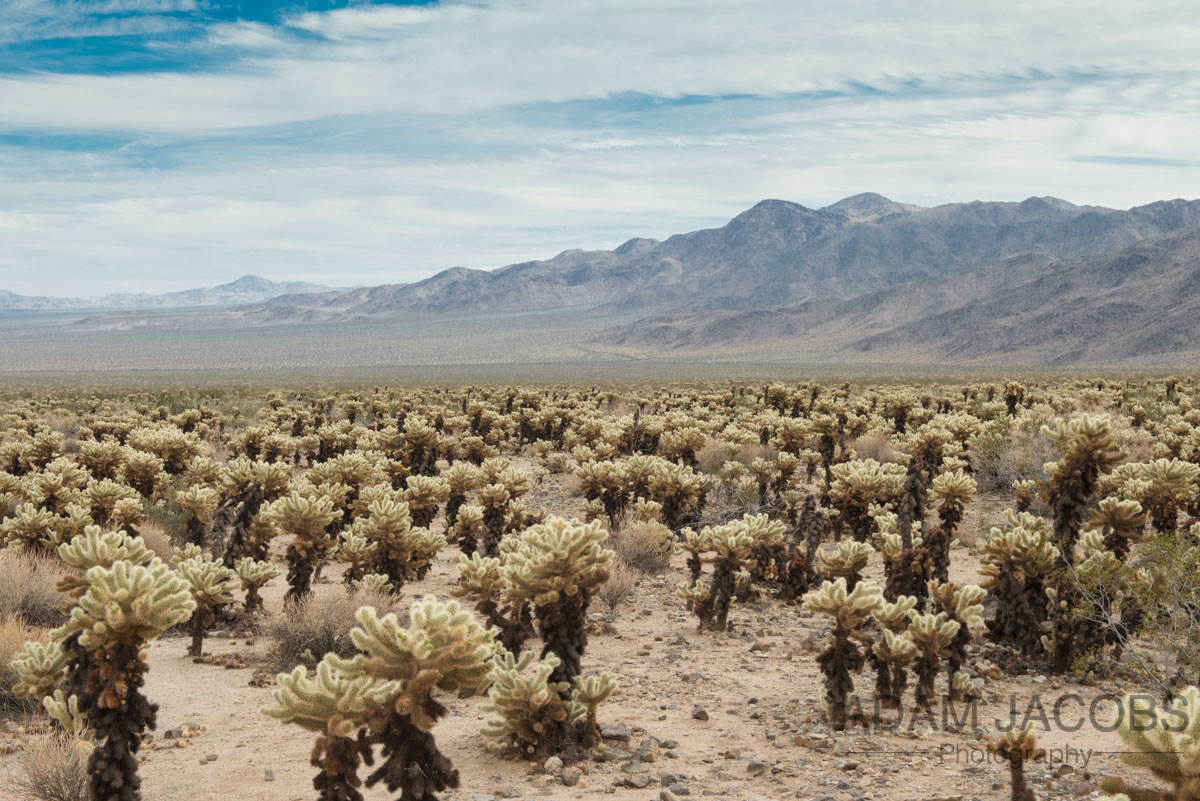
A cholla cactus garden in Joshua Tree National Park

A cholla cactus garden in Joshua Tree National Park

San Francisco Based Photographer Adam Jacobs Landscape Photography To Buy Joshua Tree National Park-13.jpg
Skull Rock at Midnight. This creepy rock formation that sits right in the center of Joshua Tree and clearly resembles a skull I shot at midnight on Halloween! Thought it was appropriate.

Skull Rock at Midnight. This creepy rock formation that sits right in the center of Joshua Tree and clearly resembles a skull I shot at midnight on Halloween! Thought it was appropriate.

Arch Rock - Joshua Tree National Park which reminded me of a mini version of the arch in Canyonlands in Utah.

Arch Rock - Joshua Tree National Park which reminded me of a mini version of the arch in Canyonlands in Utah.

San Francisco Based Photographer Adam Jacobs Landscape Photography To Buy Joshua Tree National Park-7.jpg

Couldn’t help but pull over at the side of the road and capture a field ofJoshua Trees at dusk as I was driving out of the park.

Late Summer in Yosemite by Adam Jacobs

Yosemite National Park is such a special place to photograph. It has something for everyone: enormous Sequoia trees, cascading waterfalls, beautiful meadows and of course those awe-inspiring iconic granite cliffs and rock formations including El Capitan and Half Dome (from which the North Face Logo is based)

I made a quick trip there last weekend in between some jobs to capture some landscape photos following the recent fires. It was so sad to see the massive devestation caused by the Ferguson fire which was especially noticeable when driving into the valley off the road from Wawona. However, fortunately much of the beauty and majesty of the park remains intact.

Below are a few of my favorite shots from the trip. I can’t wait to go back in a few weeks to photograph some fall color.

Fun fact…Yosemite has more granite formations than anywhere else on the planet!!

Partnered With Magic Murals by Adam Jacobs

I'm delighted to announce that a curated selection of my landscape work can now be purchased via Magic Murals, alongside work from collections from National Geographic and lots of other great imagery. 

They produce amazing murals in a variety of different finishes and have graced the walls of an array of clients ranging from Westin Hotels, The Tonight Show with Jimmy Fallon, HBO, MTV to the offices of Blue Cross Blue Shield, Hulu, Amazon and many more. It's a great small business that I'm proud to partner with along who produce a top notch product whether for business, commercial or personal and residential use.  I like how they utilizes state of the art technology and Eco-friendly inks and their QuickStik material allows you to remove the mural at anytime, take it to another location, and re-use it. Magic Murals also have the ability to create custom wall murals based on wall surface type and sizing of purposed wall space

Go ahead and check out my fine-art photography available with them by clicking here or on the image below. 

Changes To Our Privacy Policy - Keeping Your Data Safe by Adam Jacobs

Adam Jacobs Landscape Photography Antelope Canyon Photographer Fine Art

With the new GDPR (General Data Protection Regulation) rules coming into effect on May 25th, the data laws are changing for the better. We want to reassure you that we treat your details carefully and your data with the utmost respect and security.  So we've updated our Privacy Policy to reflect how we collect, protect and handle your personal information. This means that we can continue to keep you updated on gallery openings, workshops, gear reviews, Adam's adventures and of course, continue to share beautiful photographs. Anyone who is currently on our mailing list will have received an email regarding these changes but if you have any questions at any time you can contact us at info@adamjacobsphotography.com.


Kenmore Camera Show Workshops by Adam Jacobs

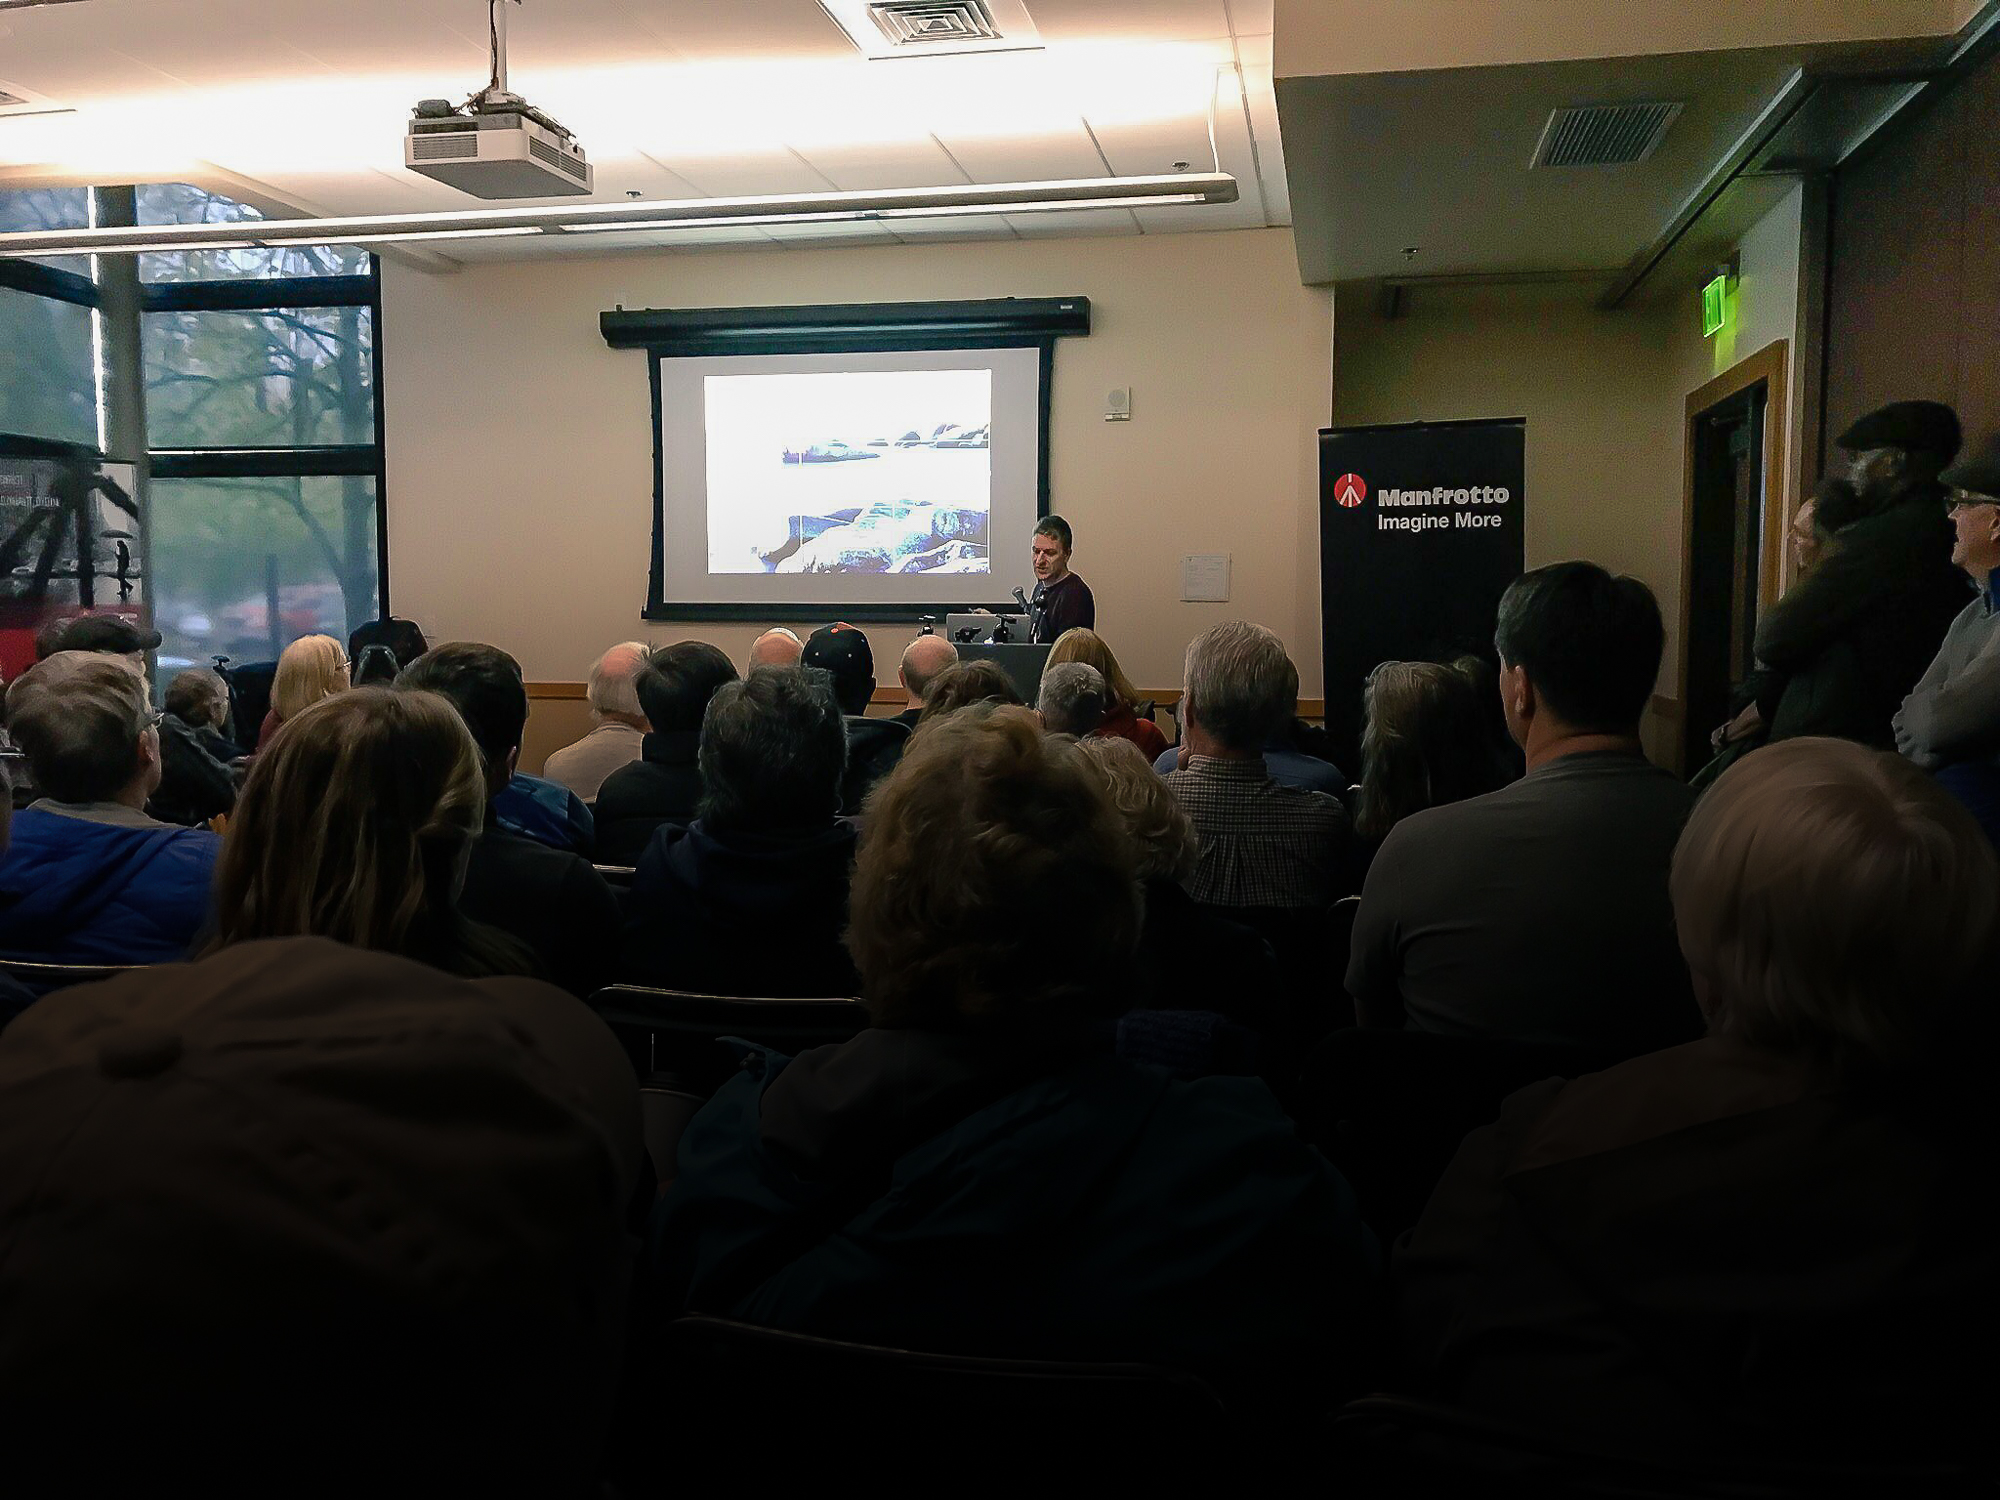
I just taught a series of photography workshops at the Kenmore Camera Show just outside of Seattle. The show is the largest photography show on the West Coast of the USA and it was great to teach so many enthusiastic people on how to improve both their landscape and macro photography. Many thanks to Manfrotto for sponsoering my workshops! 

Adam Jacobs Photography Landscape Workshop Kenmore Camera Show Photos-3.jpg
Kenmore Camera Show Photos-4.jpg
Adam Jacobs Photography Landscape Kenmore Camera Show Photos-2.jpg