Worth learning photography from a pro? Absolutely by Adam Jacobs


In today's digital age, photography is more accessible than ever. With smartphones equipped with high-quality cameras and an abundance of online tutorials, anyone can start taking pictures with just a few taps. However, the true mastery of photography lies in learning from an experienced professional. Here’s why:

1. Expertise and Knowledge in Photography

An experienced professional brings a wealth of knowledge that goes beyond the basics. They understand camera settings, lighting techniques, composition, and post-processing. This deep understanding allows them to teach the "how" and "why" behind each technique, providing a solid foundation for students to build upon.

2. Personalized Photography Feedback

One of the most significant advantages of learning from a professional is receiving personalized feedback. Online tutorials and books can offer guidance, but they cannot provide tailored advice based on your unique style and progress. A professional can critique your work, point out areas for improvement, and help you develop your artistic voice.

3. Hands-On Photography Experience

Photography is a hands-on art form. While theoretical knowledge is essential, nothing beats practical experience. Professional photographers offer workshops and classes that allow students to practice in real-world settings. This hands-on approach helps solidify concepts and techniques, making the learning process more engaging.

4. Networking Opportunities in Photography

Learning from a seasoned photographer opens doors to a network of industry contacts. Professionals often have connections with other photographers, studios, and clients. By being part of this network, students can gain access to opportunities such as internships, collaborations, and job offers.

5. Inspiration and Motivation in Photography

Professional photographers are not only teachers but also sources of inspiration. Their body of work can motivate students to push their boundaries and explore new creative possibilities. Additionally, seeing a professional’s journey, including their struggles and successes, can provide valuable insights and encouragement.

6. Keep Updated with Photography Trends and Technology

The photography industry is continually evolving with new trends and technological advancements. Experienced professionals stay updated with these changes and can pass this knowledge on to their students. Whether it's mastering the latest editing software in Lightroom or Photoshop or understanding new photography trends, learning from a professional ensures you stay current in the field.

7. Understanding the Business Side of Photography

For those interested in pursuing photography as a career, understanding the business aspect is crucial. Experienced photographers can offer guidance on building a portfolio, marketing your work, setting prices, and handling client relationships. This practical advice is invaluable for anyone looking to turn their passion into a profession.

8. Developing a Critical Eye in Photography

A professional photographer helps students develop a critical eye, teaching them to analyze and evaluate images effectively. This skill is vital for both taking and editing photos, as it allows photographers to make informed decisions that enhance their work's overall quality and impact.

9. Cultivating a Lifelong Passion for Photography

Learning from a professional can ignite a lifelong passion for photography. The mentorship and support provided by an experienced photographer can make the learning process enjoyable and rewarding, fostering a deep appreciation for the art form.


Ready to Take Your Photography Skills to the Next Level?

Enroll in our photography classes and workshops led by award winning photographer Adam Jacobs.

Sonly Alpha 9 III - Is it the game changer for photography? by Adam Jacobs

Photography and camera technology is changing at such a fast pace. I’m a dedicated Nikon user but couldn’t help but be intrigued by Sony’s latest news. Enter the Sony Alpha 9 III, the latest addition to the acclaimed Alpha series. Packed with cutting-edge features, this camera is set to redefine the standards of excellence in photography. Below are just some of the highlights of this exceptional camera:


1. Sensational Speed and Sensitivity: At the heart of the Sony Alpha 9 III lies a 35mm full-frame Exmor RS CMOS sensor, boasting 35.9 effective megapixels. This sensor is not only high in resolution but also incredibly sensitive. With a native ISO range of 100-32,000, expandable to 50-102,400, this camera is a low-light champion, capturing stunning images in the darkest conditions.

2. Lightning-Fast Autofocus: The Alpha 9 III features an impressive Fast Hybrid AF system, equipped with 759 phase-detection points and 425 contrast-detection points. This translates to lightning-fast, highly accurate focus, even for fast-moving subjects. The Real-time Eye Autofocus ensures that portraits are always crisp and detailed, while Real-time Tracking makes capturing moving subjects a breeze.

3. High-Speed Continuous Shooting: With the capability to shoot at an astonishing 30 frames per second, the Sony Alpha 9 III is perfect for sports, wildlife, and action photographers. Its large buffer allows you to capture sequences of shots without missing a moment. This speed, combined with a silent electronic shutter, is a game-changer for capturing discreet, noise-free images.

4. Stellar 8K Video Performance: Videographers, get ready to be amazed! The Alpha 9 III is an 8K video powerhouse. With its 8K recording capability, you can produce stunning, cinematic-quality footage with immense detail. This camera also supports 4K video at up to 120 frames per second for silky-smooth slow-motion shots.

5. Ergonomic and Weather-Sealed Design: Sony has taken ergonomics seriously with the Alpha 9 III. The camera's design ensures a comfortable grip and easy access to essential controls. Its robust build and weather-sealing allow you to venture into various shooting conditions with confidence, knowing your equipment can handle the elements.

6. Extended Battery Life: With the NP-FZ100 rechargeable battery, the Alpha 9 III offers an impressive battery life of up to 1,000 shots per charge. This extended battery life is a testament to Sony's commitment to minimizing interruptions during your photography sessions.

7. Connectivity and Workflow: The Alpha 9 III comes equipped with built-in Wi-Fi and Bluetooth for seamless connectivity to your smart devices. You can instantly transfer and share your images or even control the camera remotely. This connectivity streamlines your workflow, allowing you to share your creative vision effortlessly.

Conclusion: The Sony Alpha 9 III camera is a true game-changer, offering exceptional speed, sensitivity, and capabilities that cater to both photographers and videographers. Its ergonomic design, weather-sealed build, and extended battery life make it a reliable tool for a wide range of shooting conditions. With the Alpha 9 III in your hands, you're equipped to redefine excellence in photography and capture moments with unparalleled precision and creativity.

Lightroom’s Biggest New Secret by Adam Jacobs

As a photographer, one of the biggest challenges you may face is dealing with noise in your photos, especially when shooting in low-light conditions. However, with the recent release of the “Denoise” button in Lightroom, photographers now have a powerful tool at their disposal to help combat noise and improve the quality of their images.

Here’s a link for a discounted subscription to Lightroom.


The Denoise button in Lightroom has a certain ‘Wow’ factor. It’s a new feature that allows photographers to reduce noise in their images with just a click of a button. This tool uses advanced algorithms to analyze the noise in the image and then intelligently removes it while preserving the details and sharpness of the image.


How can it help you?

The Denoise button in Lightroom can benefit photographers in several ways:

Better Low-Light Photography

  • Photographers can now shoot in low-light conditions without worrying about excessive noise in their images. The Denoise button can effectively reduce noise in the shadows and highlights of the image, resulting in a cleaner, more detailed image. For example, I was able to capture this waterfall in low light using a very fast shutter speed of 1/8000 to freeze all the drops without worrying about.noise.Click on the image below to open it up large and check out the before and after after using the Denoise button.

Better Quality Images

  • By reducing noise in the image, photographers can improve the overall quality of their images. Images with less noise appear sharper, have better contrast, and look more professional. Check out the difference from this photo of a cute seal shot in Northern California. You can especially see the difference in the background blur and in the details of their face.


Faster Post-Processing

  • Before the Denoise button, photographers had to spend a considerable amount of time manually removing noise from their images in post-processing using third party apps like Topaz Denoise. However, with the Denoise button, you can now remove noise with just a click of a button, saving valuable time and effort. This leaves you more time to go out and shoot!


More Creativity

  • Photographers can now experiment with shooting in low-light conditions without worrying about noise. This allows for more creative freedom and the ability to capture images that were previously difficult to shoot.


So, if you haven't already, give the Denoise button a try and see the difference it can make in your images!


You can find it under the “Detail” section in the Develop module in the right hand sidebar.


Click here for a more in depth review form the guys over at Photoshop Cafe

Photographing President George W Bush by Adam Jacobs

It’s always excited and an enormous privilege to photograph a President. Photographing George W Bush was no exception. In fact, he’s the third living President that I’ve been honored to capture.

It takes a lot of planning, logistics and a Herculean effort by many to make these shoots happen. After a number of calls with the Secret Service, I was cleared for our recent shoot (shout out to all the team who helped that happen!).

I decided to opt against strobes and create a more relaxed environment by utilizing two large continuous lights that were color matched with the ballroom that we were in. The aim was to flood his face with soft, diffused light to. I really wanted to showcase his relaxed and personable demeanor.

In fact, post presidency, he has taken up painting and you can find some of his books here. I’d highly recommend them.

This was the second time I’d photographed him and once again he was a joy to be around; funny, smart, witty, quick as a whip and incredibly easy to work with. My aim was to capture this more relaxed, jolly and laid back side of his personality that perhaps was not seen frequently during his Presidency. I can’t release any of the photos just yet but stay tuned!

An out take from my photoshoot with President George W Bush

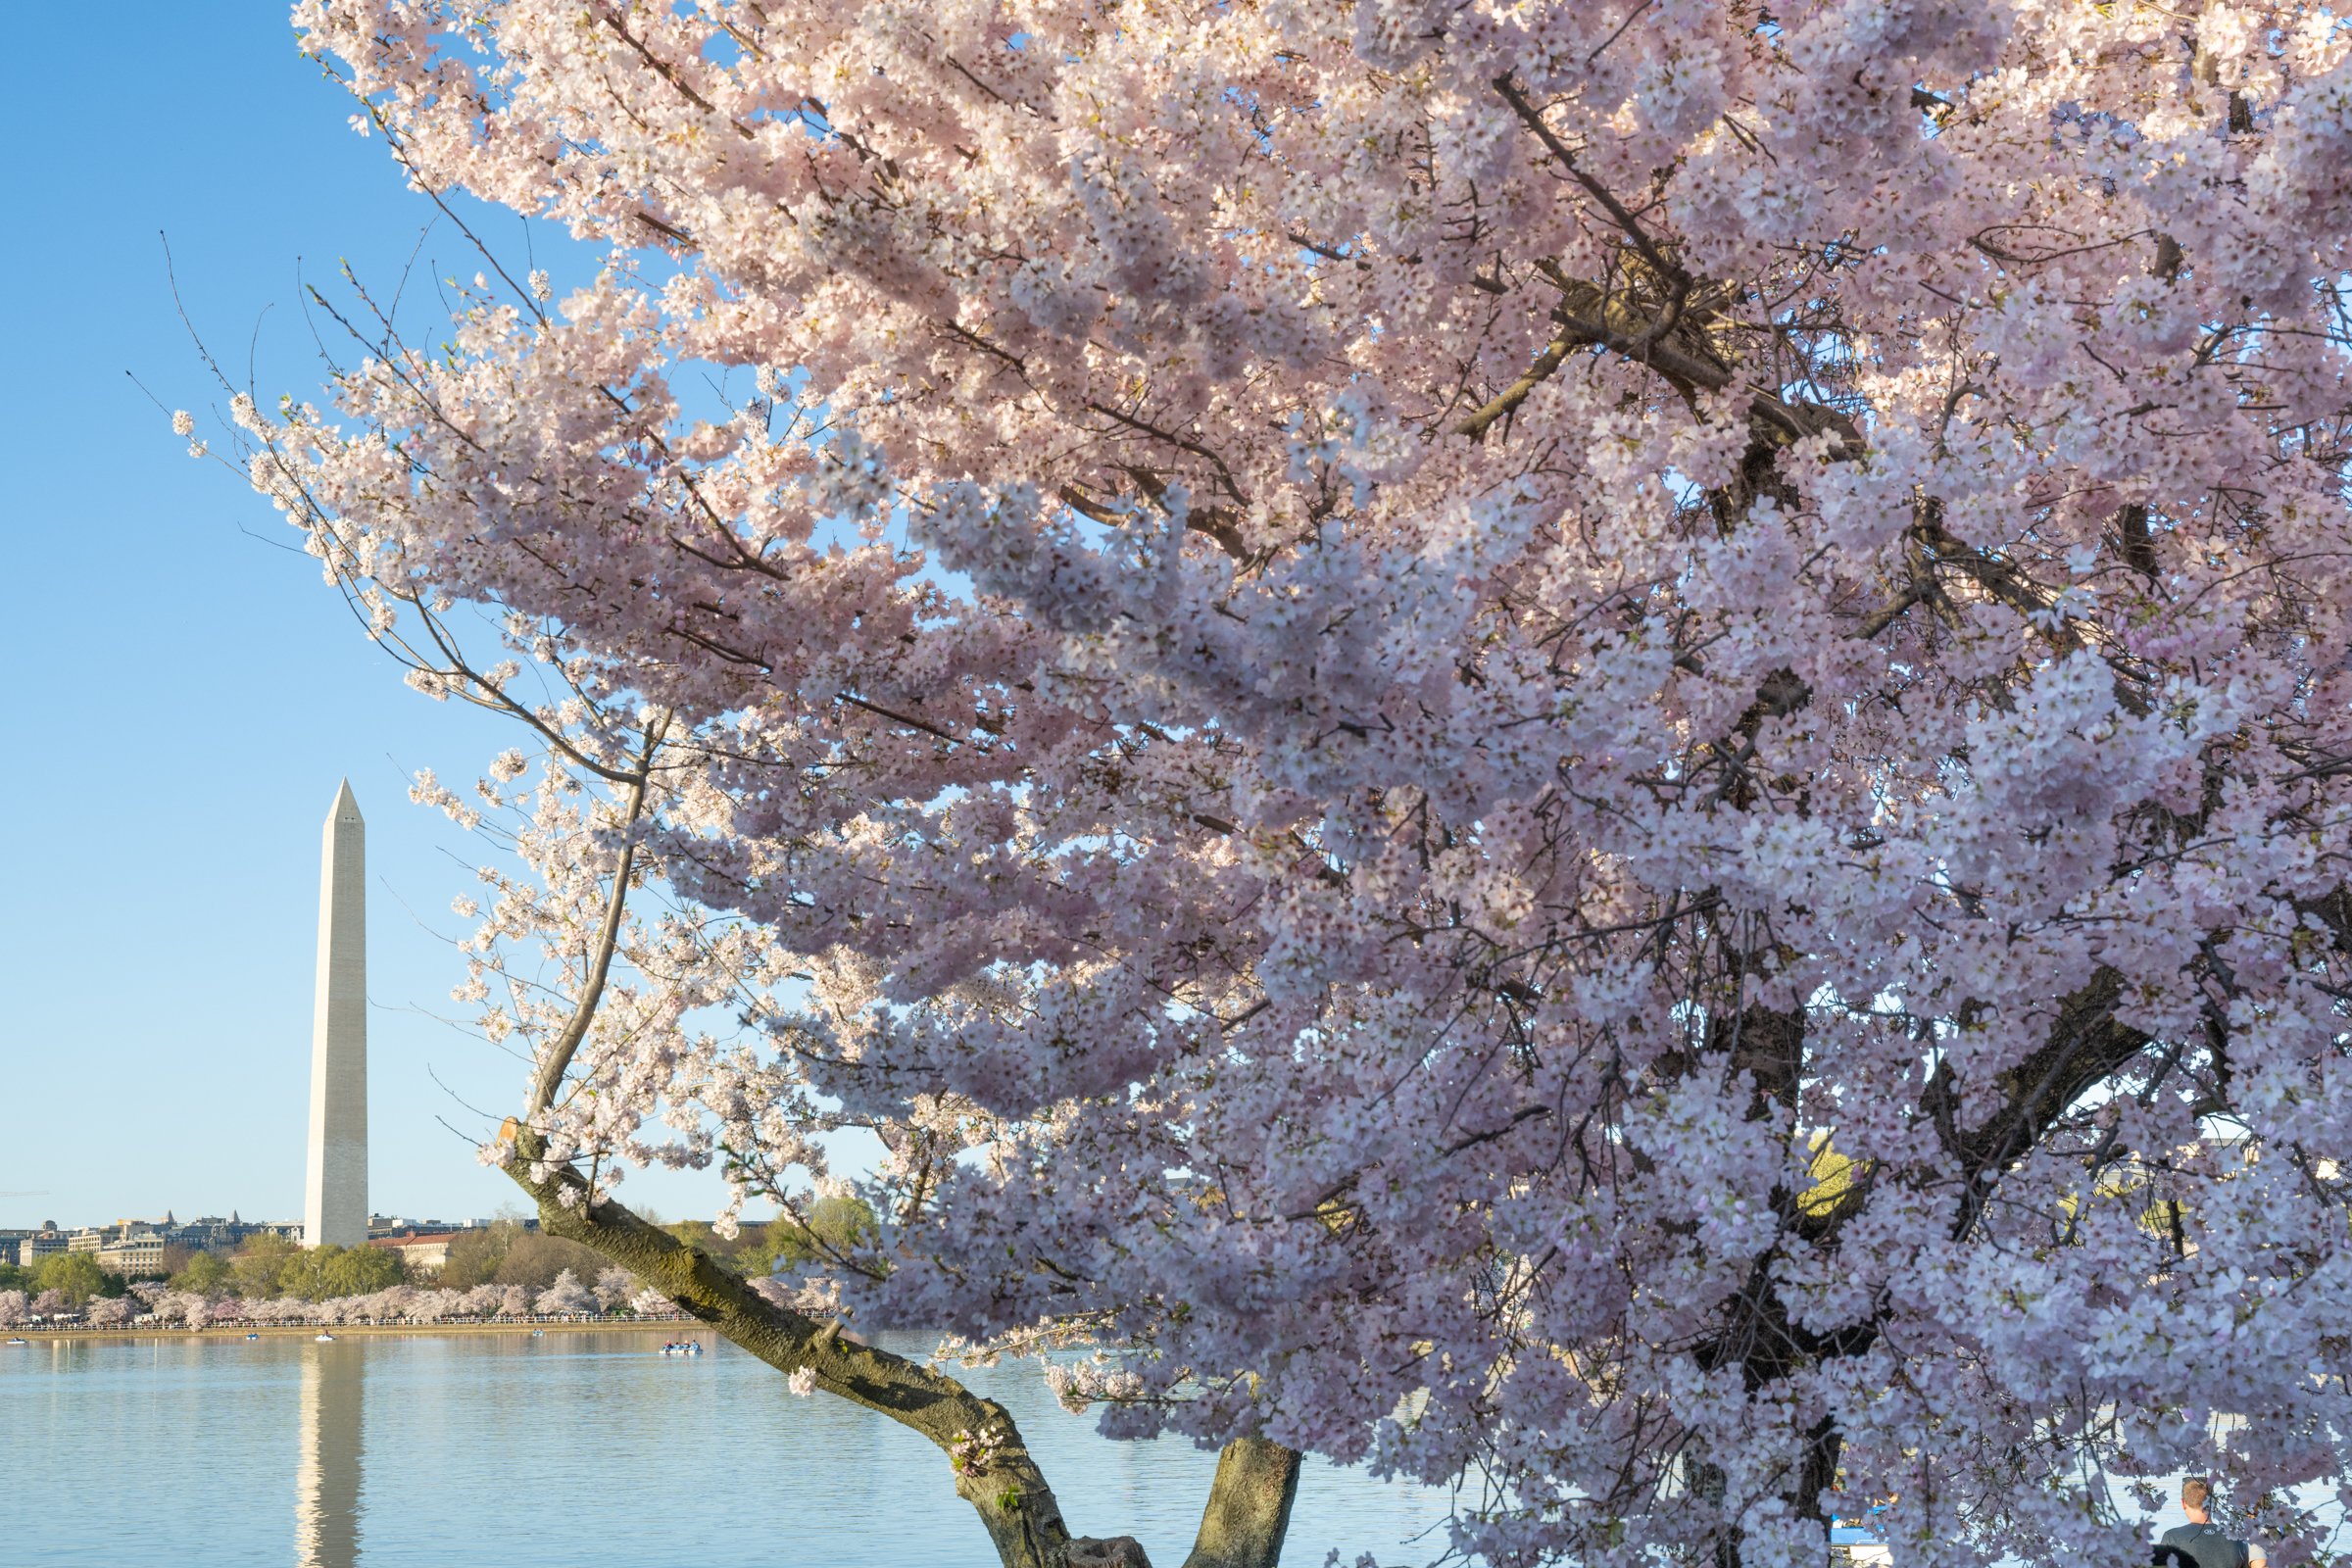
Cherry Blossom season is taking off! Capturing The Bloom in Washington D.C. by Adam Jacobs

Adam Jacobs Photography How to photograph the cherry blossom in Washington DC

Spring has sprung and with it comes the beautiful blooming of cherry blossoms in Washington DC. I've always wanted to capture this magical moment in nature and finally had a chance to do so. Here’s some tips to capture the best shots:

First and foremost, timing is key. The cherry blossoms in DC typically bloom in late March to early April, but the exact timing can vary year to year due to weather conditions. So keep an eye on the forecast. The National Parks website is also a great resource for calculating the timing of the bloom; be ready to hop on a plane if necessary!

Now, let's talk gear. For photographing cherry blossoms, I recommend a wide-angle lens to capture the grandeur of the blooms and a telephoto lens to get up close and personal with the petals. And don't forget a tripod to ensure sharpness and stability in your shots, especially if you’re shooting with a small aperture to create a larger depth of field.


But enough about the technical stuff, let's get to the fun part: exploring the cherry blossoms in DC! The most popular place is take a stroll around the Tidal Basin and soak in the beauty of the pink and white blooms against the backdrop of the city's monuments. Don't be afraid to get creative with your shots - try framing the blossoms against a bright blue sky or incorporating some of the surrounding architecture.

But be warned, you won't be the only one trying to capture the perfect cherry blossom shot. The crowds can be intense, so it's best to arrive early in the morning or later in the evening to avoid the masses. And don't be surprised if you have to compete with some over-enthusiastic selfie-takers for the perfect spot!

Photographing the cherry blossoms in DC is an experience like no other. It's a chance to witness the beauty of nature and the power of community as people from all walks of life come together to celebrate these gorgeous blooms. So grab your camera and head on down to the Tidal Basin - who knows what kind of amazing shots you'll capture!

Photographing the cherry blossom in Washington DC Tidal Basin Washington Monument

5 Essential Tips For Great Landscape Photography by Adam Jacobs

As the weather starts to get warmer, it’s a great time to get out and shoot some landscapes.

Landscape photography can be a rewarding and challenging genre of photography. With vast and ever-changing natural environments, capturing stunning landscape shots requires both skill and creativity.

Here are my top 5 tips to help you take better landscape photos:

1. Plan ahead Before heading out to shoot, it's important to plan ahead. This means researching your location and scouting out potential spots. Look for interesting vantage points, such as high points or viewpoints, that can add depth and interest to your photos. Check the weather forecast and plan your shoot around the best light conditions, such as during the golden hours and blue hour around sunrise and sunset. This shot of the Manhattan skylight was taken a few minutes after sunset during blue hour.

2. Use a tripod A tripod is essential for landscape photography; it allows you to keep your camera steady and avoid blur caused by camera shake. Use a sturdy tripod with adjustable legs and a ball head to easily adjust the camera's position. This will also allow you to use slower shutter speeds for creative effects such as long exposures. Here’s an example of a slow shutter speed taken on a beach in Southern California where the water appears soft and silky.

A long exposure photograph of the Pacific Ocean taken in Southern California by Adam Jacobs Photography

3. Focus on composition Composition is key in landscape photography. Use the rule of thirds to place your subject off-center for a more interesting composition. Consider also using leading lines to draw the viewer's eye through the scene.

Experiment with different focal lengths to capture different perspectives and create depth in your photos. For example in this image below, I compressed the layering of the San Francisco skyline using a zoom lens.

4. Pay attention to the light Lighting is crucial in landscape photography. Try to shoot during the blue hour, just before sunrise or after sunset, for moody and atmospheric shots. Consider also using filters, such as polarizers or neutral density filters, to control the light and achieve your desired effect. You can also take advantage of the golden hours, when the sun is low in the sky and the light is warm and soft. This can be seen in the image below of Half Dome in Yosemite National Park where there is a ‘cotton candy’ sky.

Half Dome in Yosemite National Park at Sunset by Adam Jacobs Photography

5. Experiment with different techniques Finally, don't be afraid to experiment with different techniques to add interest and creativity to your landscape photos. Try using long exposures to capture movement in water or clouds.. Use a wide-angle lens for dramatic perspectives or a telephoto lens to compress the scene and isolate your subject. Shoot in black and white as seen below for a classic and timeless look which brings more emphasis to the strength of your composition and lighting.

A black and white photograph of a tree growing over a temple in Cambodia by Adam Jacobs Photography

By following these tips, you'll be well on your way to capturing stunning landscape photos that showcase the beauty of nature. Remember to practice and experiment, and most importantly, enjoy the process!

Three reasons to use a CP Filter by Adam Jacobs

I often get asked why photographers / videographers should use CP (Circular Polarizer) filters. Here’s a few reasons why they are a must, especially for landscape photographers:

Before Through CP After

Using a CP Filter:

  • Increases saturation

  • Boosts Contrast

  • Improves Clarity

You can see the dramatic effect of using a CP in the photo examples on the right..

Here’s how they work:

A Circular Polarizer (CP) filter blocks certain light waves reaching the lens which have been directly reflected towards the camera at specific angles. Unlike other filters, a CP involves a certain amount of adjustability and has a rotating ring that you can manually control. This ring, when rotated, blocks specific light waves from entering the lens and subsequently reaching the camera’s sensor.

Given that the angle of light being filtered is important, so is your position to the sun to determine how light will be filtered and the resultant effect on the image. The strength of the effect of the filter (amount of polarization) varies greatly depending on the position of the sun, time of day and season. For example, you can change the angle that is filtered by moving your position in relation to the sun. The strongest polarizing effect is always achieved when you are perpendicular, (90 degrees), to the way that the sun is facing.

Unlike a UV filter, a Circular Polarizer is not totally clear . Instead, it is translucent with a grey-like tone appearance. It blocks certain types of light that are reflected towards your camera at certain angles from reaching the camera’s sensor. By filtering out a specific type of light, a CP filter affects the brightness of the exposure and always darken the overall photograph. This is usually by a reduction of two to three f stops of light. Therefore, certain camera adjustments need to be made to compensate for this loss of light to ensure that your photograph will not be under-exposed. I usually just push up my ISO to offset the slight loss of light once the filter is snapped on or slow down my shutter speed when on a tripod. 

BEFORE

WITH CP - CHECK OUT THE DIFFERENCE IN THE SKY AND WATER

Fleet Week 2020 by Adam Jacobs

Fleet Week is one of the highlights of the year in San Francisco. Thousands gather along the shore to watch fantastic airshows, salute the military and of course, watch the infamous Blue Angels fly jaw-dropping formations across landmarks such as Alcatraz and the Golden Gate Bridge.

This year will be different though. The pandemic means there will be no planes, no crowds and no parades. Instead, Fleet Week has been taken virtual encouraging people to learn more about the aircraft, ships, vessels and other things usually showcased in person from the comfort of their home.

I’m usually commissioned to photograph the airshows. This year I’ve had fun digging through my archives and found this image which is one of my favorite shots from the last few years. Enjoy!

Blue Angels Flyover Golden Gate Bridge San Francisco Adam Jacobs Photography

Colloboration with SFMOMA by Adam Jacobs

I’ve teamed up with SFMOMA to provide photographs of the museum for all of its members for use as Zoom or Microsoft Team backgrounds. Here’s the page.

These photos mean that while the museum is still closed due to the shutdown, its members can spruce up their next staff meeting or happy hour with sights from SFMOMA’s collection and nightlife from events at the museum.

Here’s how to set the images below as your background on Zoom and Microsoft Teams.

The Living Wall at SFMOMA - Adam Jacobs Photography/SFMOMA

The Living Wall at SFMOMA - Adam Jacobs Photography/SFMOMA

Sculpture Terrace at SFMOMA - Adam Jacobs Photography/SFMOMA

Sculpture Terrace at SFMOMA - Adam Jacobs Photography/SFMOMA

White Cube Lounge at SFMOMA - Adam Jacobs Photography/SFMOMA

White Cube Lounge at SFMOMA - Adam Jacobs Photography/SFMOMA